
Installing SSL on your web server is easier and safer these days, that’s because of the server configurations and the control panel that makes things easier. However, in many cases, mistakes can cause critical problems for your website. Today, I’m going to show you a step by step tutorial on how to create and install your SSL certificate.
Step 1: Get your SSL certificate
You don’t need to waste your time with complicated configurations and sign up for multiple services that never work in the end. All you have to do is to get your own SSL from NameCheap, a trusted company with years of experience and amazing services. Furthermore, this is the cheapest SSL in the web hosting industry, and you get a fully functional connection encrypting system for a full year that you can renew with a few clicks.
Step 2: Activate the SSL
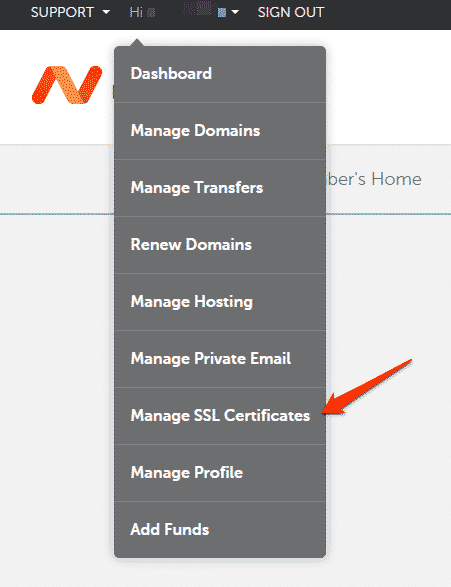
Now, that you’ve ordered your website security certificate, you need to activate it. All you have to do is to log in, then, hover over your Namecheap username at the top left corner of the page, and click on “Manage SSL Certificates” as the next screenshot.
Next, you’ll find your SSL certificate, just click on “Activate” and you’ll be taken to complete a few steps.
Step 3: Generating the CSR code in your server
This is an important process that you need to make carefully. If you have access to generating the CSR code in your hosting account, things will be fine. On the other side, if you can’t generate any code, then, you should contact your web hosting provider, and ask them to do the job for you. Just tell them simple details, including your full name, your address, and the company name if you have.
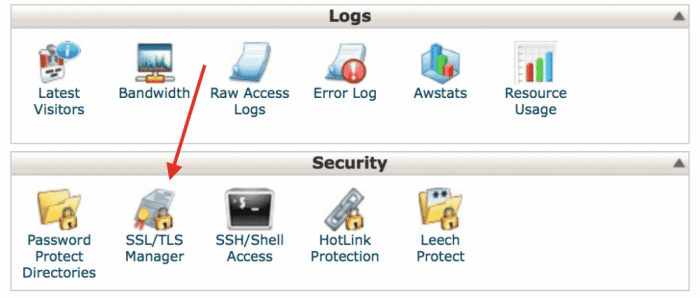
If you have a cPanel control panel, login, then, click on SSL/TLS Manager as the following screenshot example.
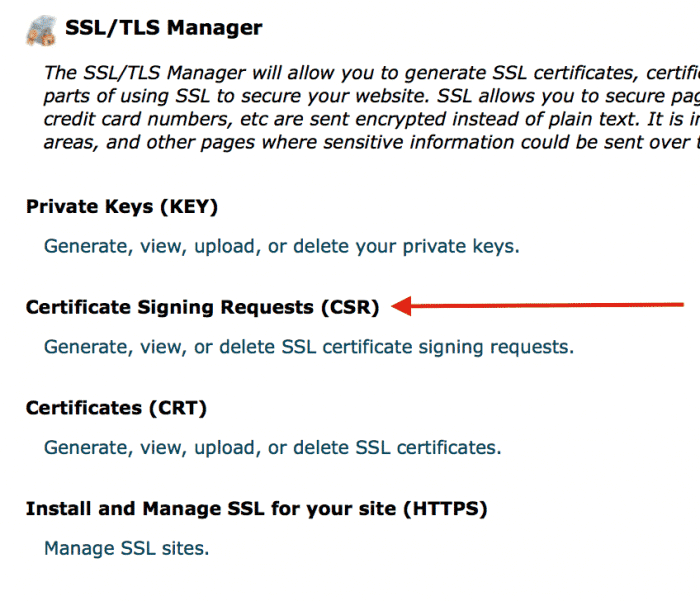
Next, you’ll a few options to choose from, just click on “Certificate Signing Requests (CSR)”.
Add the domain that you want to create the SSL and fill in the needed information and then, click on “Generate”. You’ll get the CSR code to use, just copy that code and let the page as it. Next, go back to your NameCheap page where you want to activate the certificate and choose the first option as the server. In general, it’s “Apache open SSL” or a similar thing.
Paste the CSR code you got from cPanel and add the needed information like the Name, address, and company name. You can just use your domain name as a company you don’t have or just use your name.
Please make sure that you find your domain name email in that process, if you can’t find it, create a new email with “admin” just to have the exact email that the certificate company will use to verify your domain ownership.
The certificate email approval request will be sent to your email, check it and click on the link, then, add the exact code you got to confirm the certificate request. In a few minutes, you’ll get your SSL certificate file in your email with a ZIP file. You just need that text file.
Step 4: Install the certificate
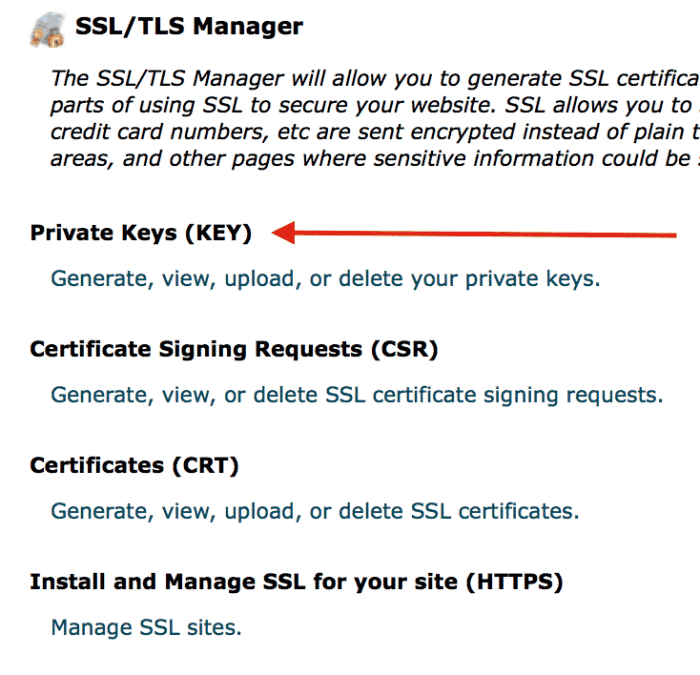
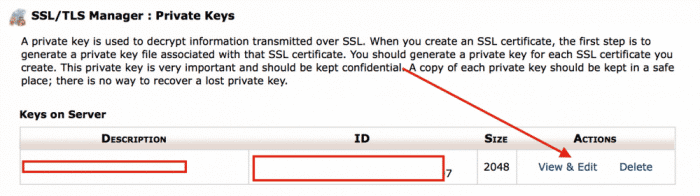
Before everything, you need to have your “Private Key”, it should be generated automatically with the CSR code, just click on “SSL/TLS Manager” again, and then, “Private Keys (Key), Generate, view, upload, or delete” as the next screenshot example.
In this case, you’ll find your private key already there, so, click on “View & Edit”.
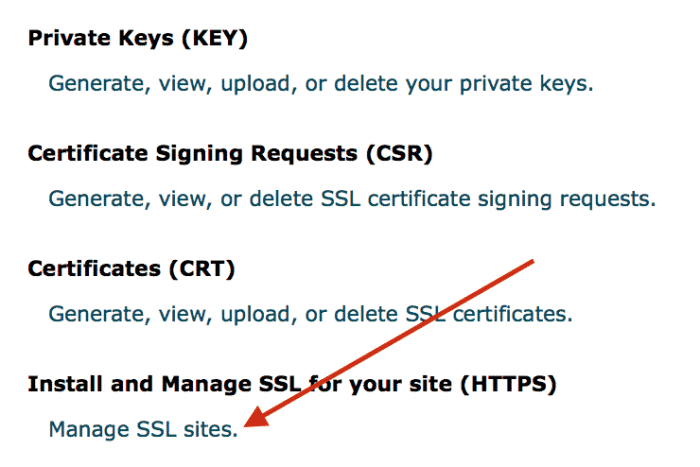
You’ll get the Private Keycode, let that page opened, and come back to the cPanel account with another window or page. Click on SSL/TLS Manager and this time choose “Manage SSL Sites” under “Install and Manage SSL”.
Finally, you need to copy and paste both, the certificate code that you’ve received in your email, and second, the private key code that you view on the opened page. You don’t need to use the “Certificate Authority Bundle” as it’s an option. Click the “Install Certificate” button and everything will be working if you’ve followed all the steps as they’re.
Please add your comment if you found problems installing your SSL code or generating the other codes that you need. Things can be different from a hosting company to another.